7 Outdoor Flooring Maintenance Tips

how to clean, maintain, and protect your natural stone flooring

jared-weaver-outdoor-flooring-2-d&s-flooring copy-min.jpg

NATURAL STONE

A cool fact about natural stone from the DalTile Website:

Natural stone has its own unique qualities that not only distinguish it from man-made materials, but also should be considered in selecting it for a particular project. Stone is not manufactured; it is a product of nature. Blocks are removed from the quarry, slabs are cut from these blocks, and the slabs are further fabricated into the final stone to be installed. Each block is different; each slab is different. Skillful blending or matching of the dimension stone blocks, veneer panels, tops, etc., results in a beautiful blending of nature’s variety and man’s design. “Uniformity of material,” when applied to natural stone, is a term of relative value that needs to be understood when making a selection.
— DalTile


Follow these tips to keep your slate, marble, travertine, onyx, and limestone in the best shape.

  1. Know Your Stone. Travertine stone for example, has voids in it due to the way it forms in nature. Certain white marbles if exposed to direct sunlight will yellow over time, and natural stone in general has a different cleaning regimen than man-made ceramic. Therefore, know your product so you can keep it looking and functioning at its best.
  2. Seal and Regularly Reseal Your Stone. Natural stone is more porous by nature compared to man-made ceramic tile. Properly sealing the stone with a high quality sealer is crucial to stain prevention. You’ll know it’s time to reseal your stone when water fails to bead on the surface but instead disappears into the stone and leaves a dark spot.
  3. Vacuum or Dust Mop Regularly. Dirt and grit can scratch the surface of natural stone. So remove it via vacuuming or dust mopping before applying the cleaning solution with a mop.
  4. Don’t Use Acids or Bleach to Clean. Introducing even mild acids to the natural stone can dull, etch, or otherwise damage your stone, so avoid using cleaners with vinegar, lemon juice, or bleach. Use a neutral pH cleaner designed for stone. (See recommendations below)
  5. Clean Up Water and Spills Right Away. Dry up any standing water from your stone flooring. Make sure your sprinkler isn’t also watering your floor as it waters your lawn. Always get after stain-causing spills as soon as you can. The longer a stain has to set in the stone, the more difficult to even impossible it will be to get out.
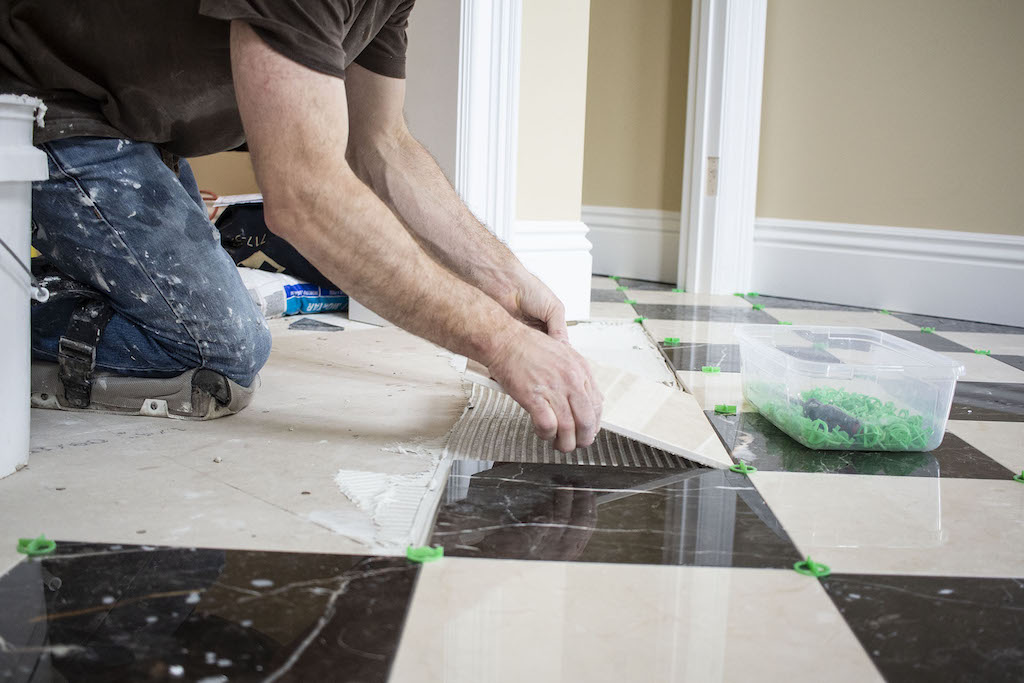
    1. Installation Note: Allow your newly installed tile to sit for 7 days before aggressive use or steam cleaning.
  6. Stain Removal is Possible. Using what’s called a ‘poultice’, an absorptive clay cleaning powder,  apply it for stain removal. There are different types of poultices depending on the type of stain. These can have a dulling effect on your stone.  You might need to polish your stone after using a poultice to restore your stone's natural shine.
  7. Buy Enough of the Product on the Front End. If part of your floor gets damaged and needs to be replaced, make sure you have enough of the stone to replace and match the original floor in the first place. Because you’re using a product created by natural processes, even the same type of stone harvested from the same quarry can look very different.

For more tips, consult your flooring salesman as you’re selecting flooring options as well as manufacturer product information.


Some Recommended Sealing Products:

  • Pre-Grout Sealer: DuPont Stone Tech Professional Bullet Proof (follow manufacturer instructions for application process)DuPont Stone Tech Professional Heavy Duty Sealer (follow manufacturer instructions for application process)

  • Aqua Mix Ultra-Solv (follow manufacturer instructions for application process)

  • Post-Grout Sealer: DuPont Stone Tech Professional Impregnator Pro (follow manufacturer instructions for application process)

  • Post-Grout Sealer: Aqua Mix Sealers Choice Gold (follow manufacturer instructions for application process)

Some Recommended Cleaning Products

  • DuPont™ StoneTech® Professional Stone & Tile Cleaner

7 Indoor Flooring Maintenance Tips | Care for Your Floor

Clean, Maintain, and Protect your Hardwood, Tile, Resilient Vinyl, and Carpet Flooring

josh-tangert-960-shaw-hard-surface-cleaner-D&S-flooring-min.gif

HARDWOOD

Whether engineered or solid, these insights will help you keep your hardwood floor in good shape.

  1. Sweep, dust and vacuum your floors. If using a vacuum, attach the proper hard floor adapter to avoid scratching the finish of your wood.

  2. Use the right cloth. Microfiber is best. It kind of goes without saying, but especially avoid steel wool, scouring powders, or abrasive cleaners. Also avoid using a buffing machine. You know, the ones designed to remove floor finishes...

  3. Use the right cleaner. Choosing the proper cleaning solution depends on the finish of your hardwood (surface finish or penetrating finish), not so much the wood itself. Using oil-based, wax, polish or strong ammoniated products can dull your floor’s finish, and that would not be cool. We carry Shaw Floor's hard surface cleaner in our showroom. (You may have noticed Josh demonstrating it.)

  4. Wipe up spilled water immediately. Dry any standing water as soon as possible. Even surface finished hardwood can suffer water damage.

  5. Don’t mop (in the traditional sense where you're soaking your floors with lots of water). Mopping your hardwood floor introduces way more water than you’d ever want to spill onto your floor by accident. This excess water could seep into the wood fibers and cause swelling and warping, and that would be sad 😢

  6. Use entry mats and floor protectors. Implementing the use of entry mats in high traffic areas and floor protectors underneath heavy furniture can increase the lifespan of your floor. Ask us for some felt floor protectors, and we'll hook you up.

  7. Rearrange Your Furniture Periodically. Let your flooring share the load as evenly as possible by redirecting high traffic each time you move your furniture around.

    1. BONUS. So here’s another cool tip: If you drop gum or candle wax onto your floor, you can remove it by first hardening it by rubbing it with an ice cube and then scraping it off with a plastic card.

TILE

Keeping your ceramic, porcelain, or natural stone tile at its best.

  1. Sweep or vacuum first. Before using any cleaning solutions on your tile, remove dirt and debris with a soft-bristled broom or vacuum with a hard surface attachment to avoid putting scratches in your glazed tile.

  2. Glazed tile cleaning. Mmmm… glazed. After sweeping or vacuuming, clean your tile with an all-purpose (non-oil-based) household cleaner. Mixing some water with a mild detergent also works. If you’re feeling creative, you could introduce an acidic ingredient like fresh lemon juice to your cleaning solution, effective for removing soap scum and alkaline type stains. Don't add an acidic solution to your cleaner if you're cleaning marble or other natural stone flooring. The pH balance in your cleaning solution needs to be neutral or it will break down your material. Read more about caring for your natural stone flooring in this article.

  3. Unglazed tile cleaning. Unglazed ceramic or porcelain (man-made) tile lacks the melted glass coating of its glazed counterpart. It’s a lot less slippery when wet but more porous which means you need to be more gentle when cleaning it. Hot water and white vinegar mixture is recommended. The vinegar mixture is great especially if you have kids and pets since it’s chemical-free and safe if ingested.

  4. Cotton, microfiber, or chamois-style cloths. Avoid using sponges or sponge mops as they tend to push dirt and grime into cracks and grout joints.

  5. Grout Joint Cleaning Tip. Mix baking soda and water together, forming a paste, and rub it onto your dirty grout joints. After letting it sit overnight, scrub the grout with a stiff nylon brush. Repeating this step to get your desired results may be necessary.

  6. Reseal your floors. If you want your tile installation to keep looking good and remain mostly impervious to stains, seal them after installation then reseal them every year to 2 years. If water doesn’t bead on the grout lines, it’s probably time for the resealing regimen.

  7. Protection. Tile is strong, but it still suffers wear and tear. the use of mats in high traffic areas and floor protectors underneath furniture is recommended.

RESILIENT VINYL

Follow these tips to keep your resilient vinyl flooring (Sheet/LVP/LVT) in tip top shape.

  1. Immediately following installation. Keep foot traffic to a minimum. And for glue down vinyl, avoid putting furniture on the floor until after the first 24 hours.

  2. Clean Daily. (Or at least make that your aim) Clear your floor of potentially damaging dirt and grit by dust mopping or sweeping every day. Having good entry mats can cut down on the amount of dirt and oil tracked inside from the great outdoors.

  3. Clean spills immediately. Vinyl is waterproof but leaving a spill standing on your floor for a long period of time increases the chance of staining.

  4. Protection. Hopefully you get this by now. Protective mats (without rubber or latex backing) at high traffic areas and pivot joints (like in front of your kitchen sink) can increase the longevity of your floors and prevent visible wear spots. Floor protectors (plastic or felt) that are non-pigmented and at least an inch wide are recommended.

  5. Avoid direct sunlight. This is a tip for all flooring and furniture, really. Lower the blinds during bright times of the day to minimize direct sunlight on your floors. Over time, it can cause discoloration. Excessive temperatures can also cause expansion of the vinyl material. While some companies are coming out with dimensionally stable options, it's still a good tip!

  6. Do not use vinegar or soap or detergents. Soaps and detergents can leave a dulling effect on your floor's finish. Use an approved resilient vinyl cleaning solution like Shaw Flooring’s R2X Hard Surface cleaner or Mannington Flooring’s Rinse-Free Cleaner.

  7. Do not use a vacuum with a rotating beater bar. It could scratch your beautiful floor, and again, that would be so sad.

CARPET

Whether cut pile, loop, or the cut and loop carpet combo, follow these maintenance and cleaning care tips for your maximum carpet satisfaction.

  1. Install the Right Pad. During installation, get it right from the beginning with the proper carpet padding, especially on stairs. Check the carpet's warranty recommendations and explore your carpet pad options.

  2. Don't Track Dirt Inside. This is so obvious it's almost funny. But seriously, make your life easier and make your carpet's life longer by having good walk-off mats to keep the dirt, grit, soil, and asphalt outside and off your carpet.

  3. Vacuum Regularly. This is stated by one of our main supplier's as the most important maintenance tip. In light of this and the myriad of vacuum cleaner options on the market, we've included a link below to help you make an educated vacuum cleaner decision! We recommend that you then use that educatedly purchased vacuum cleaner to clean your carpets thoroughly, especially in high traffic areas.

  4. Treat the Affected Area Immediately. The sooner you can get at it, the better. The longer spilled foods or liquid stands on your carpet, the more likely they are to leave a stain.

  5. Clean Your Carpets Regularly. Using a hot water extraction method, clean your carpets every 12 to 18 months. It's recommended to hire a professional cleaning service and one that follows the Carpet and Rug Institute Seal of Approval. A poorly cleaned rug can actually increase the rate at which your carpet breaks down. So make sure you don't cut corners here.

  6. Minor Repairs. Use scissors to cut back snags or loose piles. If the there are small burn spots on the carpet, you can use a pair of curved nail scissors to cut back the burnt tips.

  7. Spot Cleaning. When spot cleaning, completely remove the detergent or solution used to avoid any residual sticky residue that just attracts more dirt. Derry, our owner, would highly recommend using Shaw Flooring's R2X Stain & Soil Remover, which doesn't need to be rinsed out. Bonus!

Here are some links to super helpful resources by two of our main carpet suppliers:

Shaw Flooring's Website of All Things Cleaning and Maintenance

Vacuum Recommendations: Mohawk's

UPRIGHT MODEL