All About Resilient Vinyl Flooring

Resilient Vinyl Flooring

ABOUT RESILIENT VINYL FLOORING

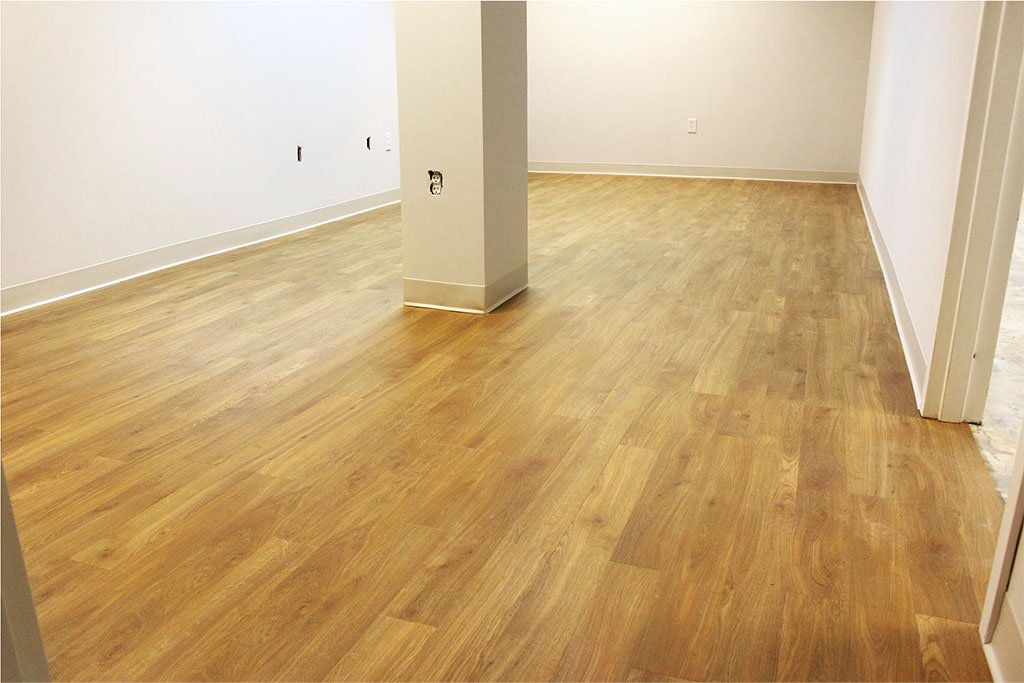
Resilient vinyl flooring is the most popular and fastest-growing hard surface flooring in the United States. At D&S, we often find ourselves installing sheet vinyl, luxury vinyl plank (LVP), luxury vinyl tile (LVT), or rigid core vinyl. Resilient vinyl is affordable, waterproof*, and low maintenance. Plus, thanks to advanced engineering, modern, high-definition printing technology, and embossing techniques, resilient vinyl is durable, practical, appealing, and realistic. At a glance, some vinyl flooring can easily be mistaken for real hardwood or tile! (And well, with new engineering that combines rigid core construction with real hardwood veneers, it actually is real hardwood you’re looking at!)

(*the flooring itself is waterproof, but water might still penetrate to the subfloor through joints in click-together planks or tiles. We recommend reading the warranty information provided by the manufacturer to be best informed about your purchase.)

Construction of Resilient Vinyl

BF Goodrich scientist Waldo Semon

Scientist Waldo Semon.

Resilient vinyl flooring gets its name because it ‘bounces back’ to its original form after being compressed. In terms of makeup, its main component is polyvinyl chloride (PVC), a synthetic plastic polymer. Polymers are both durable and resilient which gives this type of flooring its strength, flexibility, and also its waterproof quality. Interestingly, vinyl was discovered by accident when in 1926, the BF Goodrich scientist Waldo Semon failed at creating an adhesive and discovered the rubber-like vinyl (polyvinyl chloride) instead. Thank you, Waldo!

Layers of Resilient Vinyl

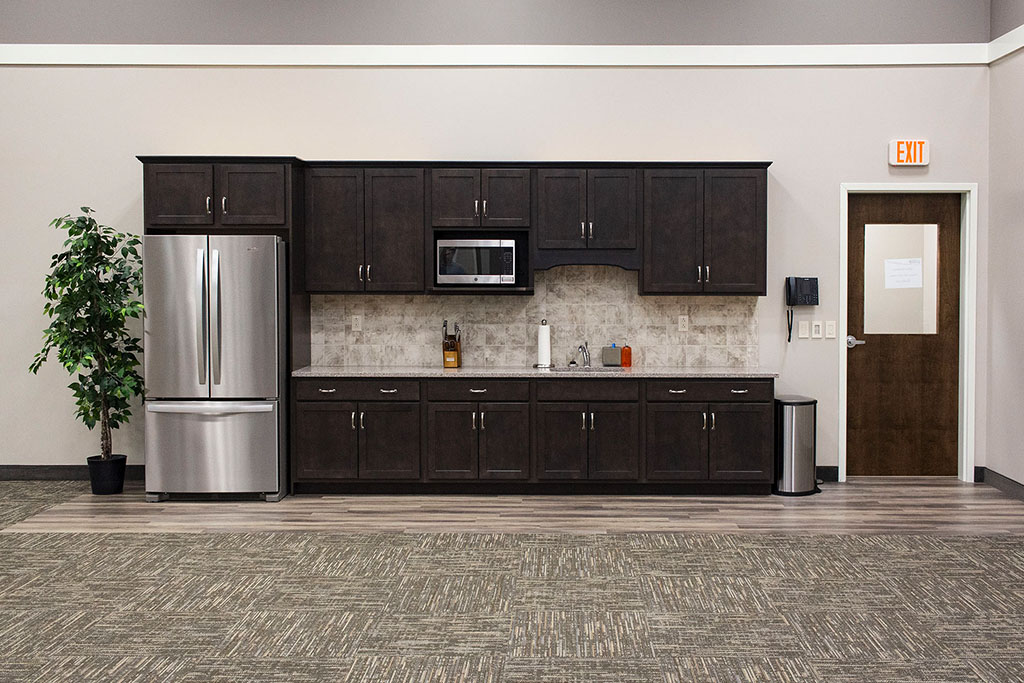
There are typically 5 layers that make up resilient vinyl. The topmost layer is either a urethane or aluminum oxide finish which gives the product the appropriate sheen depending on the desired style. Directly underneath the finish is a clear PVC film layer called the wear layer, the most important layer of the product as it determines its durability over time. A vinyl product with a thin wear layer will be less expensive, but it won’t last as long. The wear layer provides a high degree of protection against scuffs, scratches, stains, and well, wear, and can range in thickness from 6 mils to 12 mils for residential flooring and 20 mils or more for commercial flooring. (Mils are distinct from millimeters. Mils is a measurement of plastics like grocery bags and plastic drop cloths. For you math people out there, 1 mil is equal to .0254 millimeters.) Except for VCT and rigid core vinyl with wood veneers, each vinyl product will have a wear layer. Both the finish and wear layer work together to prevent damage to the rest of the material. The third layer is the print layer which gives the resilient vinyl flooring its look. Among the most popular looks are wood, stone, or patterned designs. Because the third layer is printed, vinyl can have any look people can dream up! Underneath the print layer is the middle or core layer, the real “meat” of the product. The core gives vinyl most of its thickness and adds to the product’s durability. Thicker vinyls like those in the rigid core family score high in the durability category while also doing an excellent job at hiding subfloor imperfections. Last is the backing layer which is the bottom-most layer that rests against the subfloor. Resilient vinyl backing can include felt, PVC, rubber, or cork materials, the purpose of which is to insulate sound, protect against mold, and increase comfort underfoot. Depending on the product, the backing is either glued down to or ‘floated’ on the subfloor.

Armstrong Flooring’s Vinyl Composition Tile // Standard Excelon Imperial Texture

Vinyl Composition Tile (VCT) doesn’t fit the above description as it lacks a print film layer or PVC wear layer. VCT is a through-body design, which means it is the same color and look throughout the whole of the material. One benefit of this construction is that scratches and nicks can be buffed out and the surface refinished. A drawback, however, is the amount of maintenance required to keep VCT looking its best and to resist wear. While up-front costs are low, the cost comparison between VCT and LVT over time shows LVT to be the more cost-effective investment.

Resilient vinyl flooring falls into three basic categories of composition: traditional sheet vinyl, flexible luxury vinyl plank or tile, and rigid core vinyl.

Traditional Sheet Vinyl

Traditional vinyl flooring is composed completely of PVC and other similar natural and synthetic polymers. From the wear layer to the backing, PVC is the main component.  People often mistakenly refer to sheet vinyl as ‘linoleum’. Though it looks similar, linoleum and sheet vinyl are different products. Read more about linoleum here. Unlike linoleum, traditional sheet vinyl can come in a myriad of designs including wood looks, stone looks, patterns, and abstract designs.

If you’re looking for a cost-effective option with many of the benefits of resilient vinyl, sheet vinyl is the way to go. With improved printing technology, thick wear layers and improved finishes, some of the products in this category boast 25-year to lifetime warranties for residential use. Additionally, sheet vinyl’s waterproof quality is greater than tiles and planks as it lacks the many joints for water to penetrate that come with those formats.

Flexible Luxury Vinyl Plank or Tile

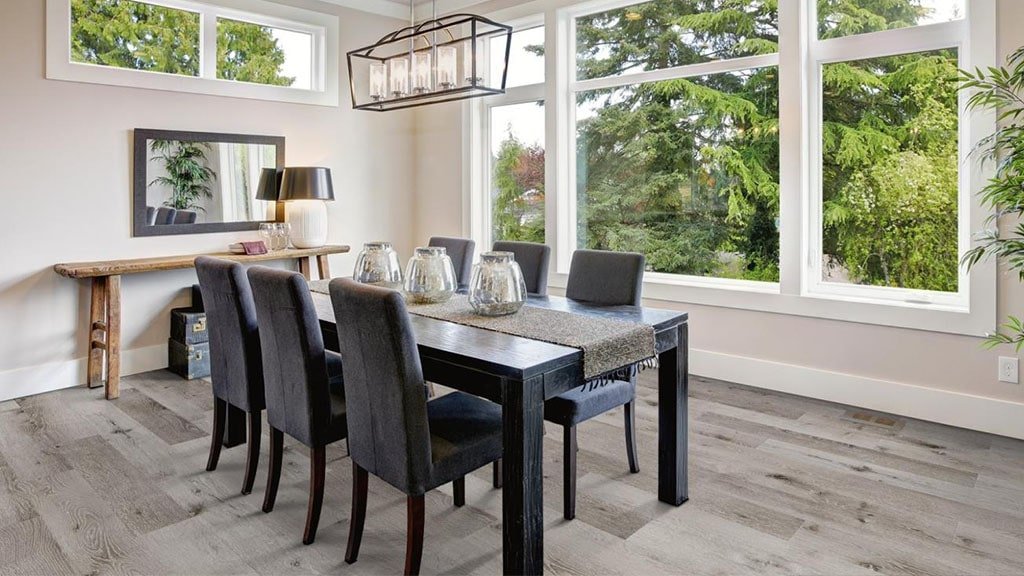
Resilient vinyl got its first big upgrade in the 1970s when manufacturers began producing vinyl in individual planks. These planks soon started coming with beveled edges that added to the realism. With imprinted wood or stone designs and these additional features, planks looked a lot more believable than sheet vinyl. It wasn’t just called “sheet vinyl” anymore, it was “luxury vinyl plank” or LVP for short. Indeed, it was more luxurious. Since those early days, luxury vinyl plank and luxury vinyl tile (LVT) have only been improved upon. Besides the removal of asbestos from the manufacturing process in the 80s, a number of innovations and improvements have added quality and value to LVP and LVT. These improvements include better graphics thanks to advanced digital printing, embossing techniques that add texture to compliment the graphics, improved backing layers to increase softness and sound dampening, thicker wear layers to withstand commercial applications, and more durable and UV resistant finishes. 
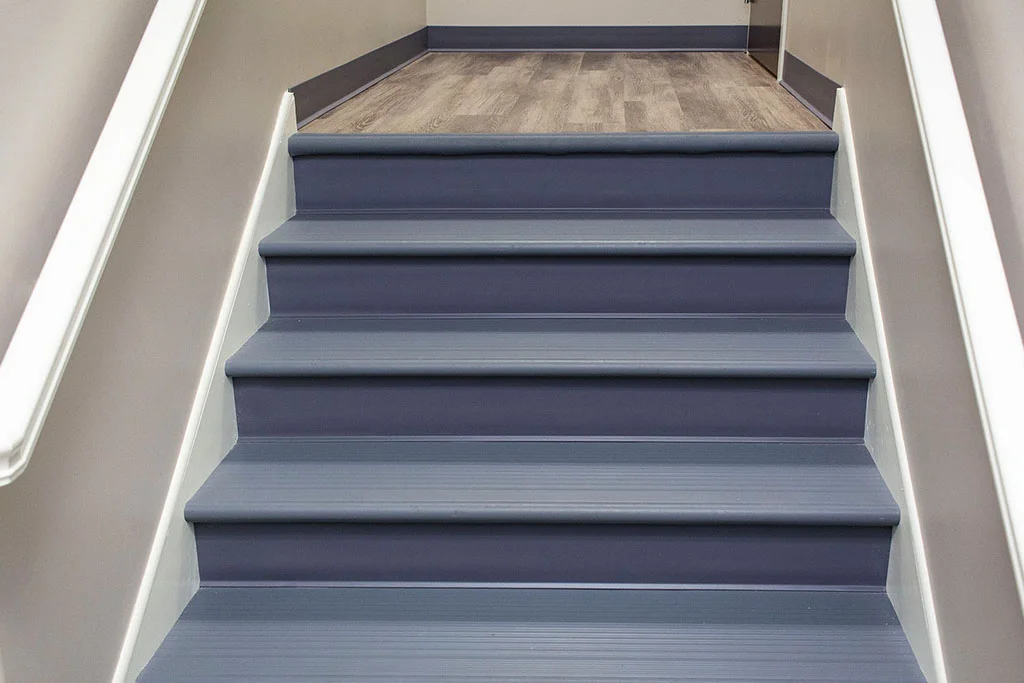
Rigid Core Vinyl

In 2013, vinyl flooring got another upgrade when US Floors introduced the first rigid core vinyl planks to the market. Rigid core vinyl, also referred to as Engineered Vinyl Plank (EVP) can be up to 5 times thicker than traditional vinyl flooring. This comes from its more dense, engineered core. US Floors’ CoreTec Plus engineered vinyl planks, for example, come with an extruded core made from recycled wood and bamboo dust, limestone, and virgin PVC. Rigid core planks and tiles also come with a click-together system which makes for easy, floating installation; there’s no need for glue! The extra thickness does a lot better at hiding subfloor imperfections which makes for less subfloor preparation and does a better job at absorbing sound. The dense cores also help with dent resistance and, like flexible LVP, the option of thick wear layers keep the product looking new for years. 

WPC and SPC

Within the rigid core vinyl category are two subcategories of product: wood polymer composite (WPC) and stone polymer composite (SPC). WPC products are thicker and though dense, are more resilient and less rigid than SPCs. Consumers will have a softer walk across the room with WPC vinyl. WPCs are made up of wood pulp, plasticizers, and foaming agents. WPC resilient vinyl is more resistant to indentation than traditional LVP or sheet vinyl while maintaining the softer feel of vinyl underfoot. SPC vinyl products are thinner and more rigid. SPC cores are typically comprised of 60% calcium carbonate (limestone), PVC and plasticizers. As technology progresses, companies are manufacturing WPC options with even better-performing cores for greater dent resistance and higher dimensional stability. Companies are starting to use magnesium oxide (MgO) in the rigid core construction as well, so look for that the next time you’re in the market for rigid core LVP!

Examples of WPC resilient vinyl include Mannington Adura Max LVP, US Floors CoreTec Plus, Tarkett ProGen, and Shaw Floors Floorte Pro, pictured in that order below.

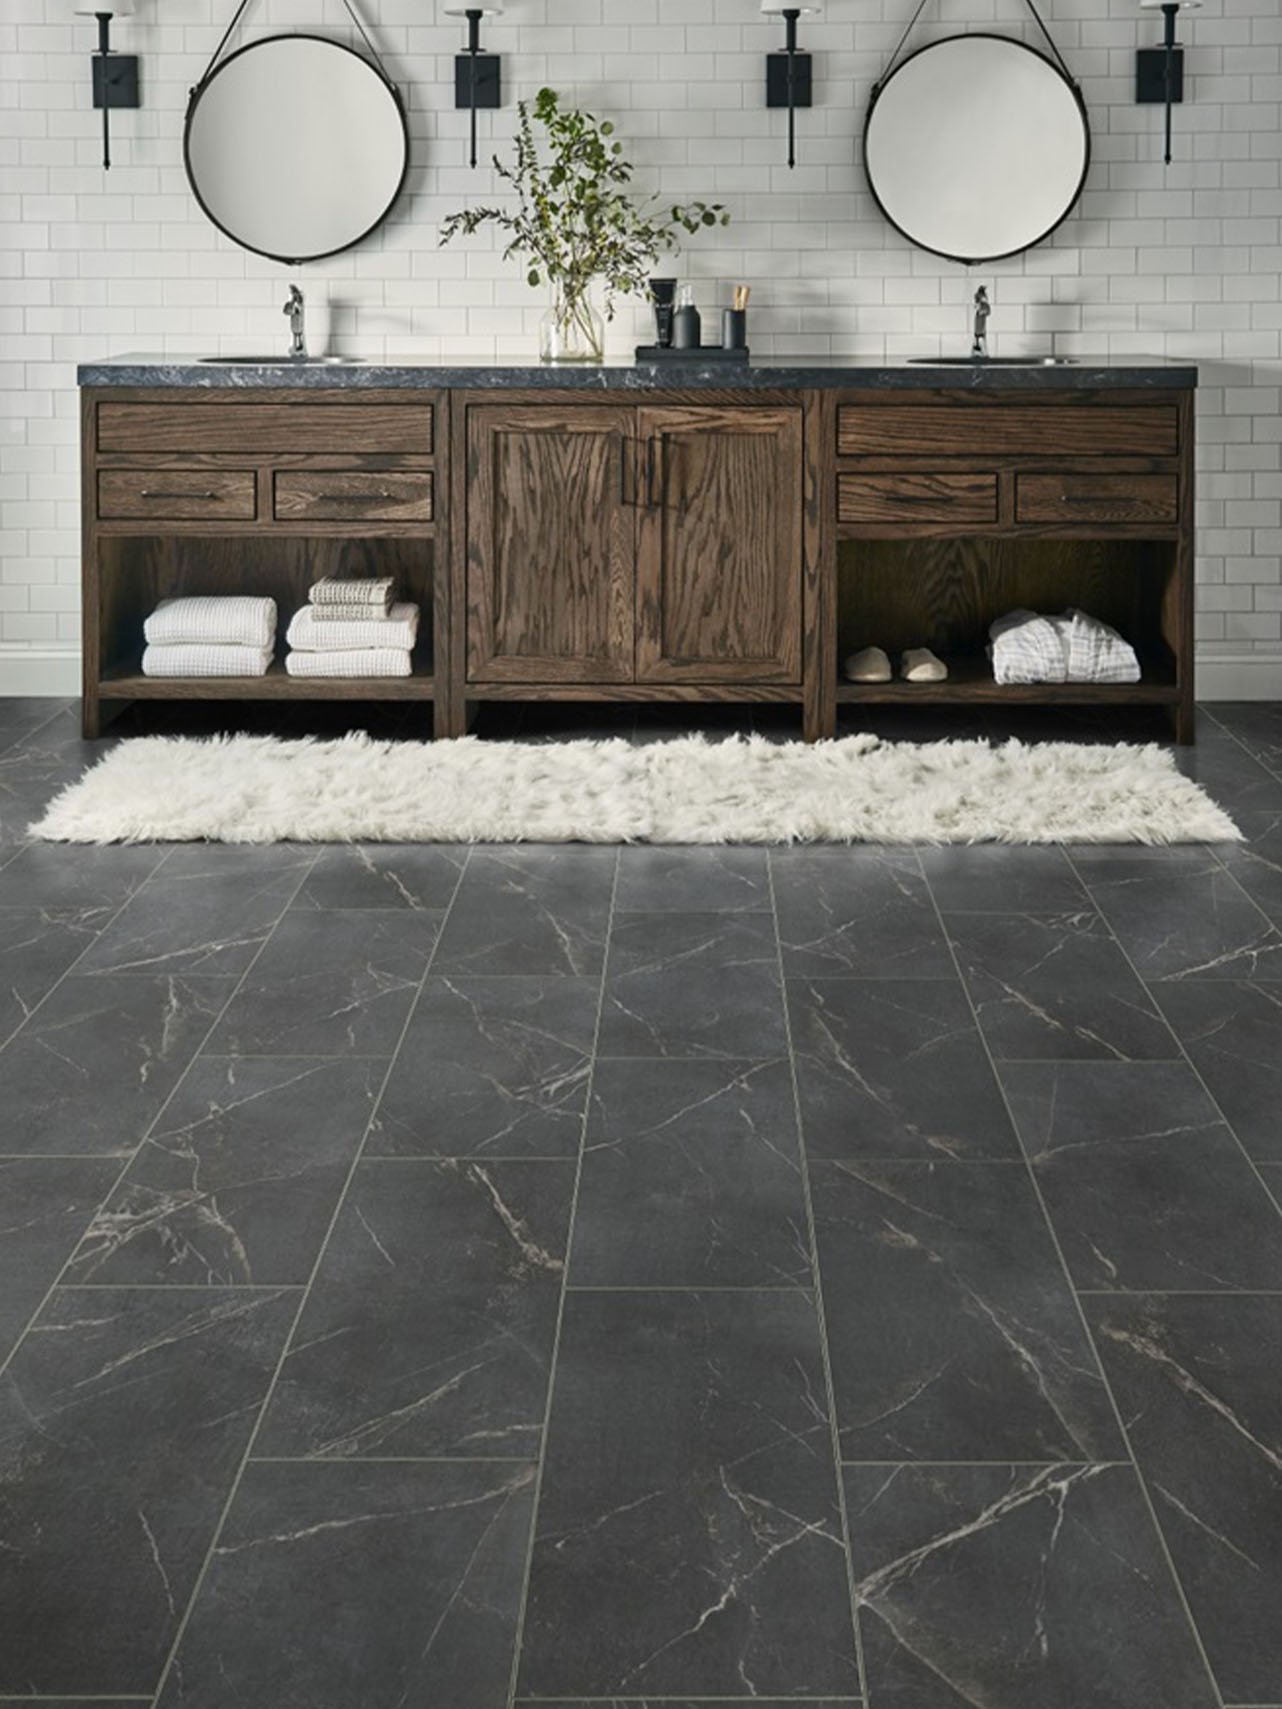
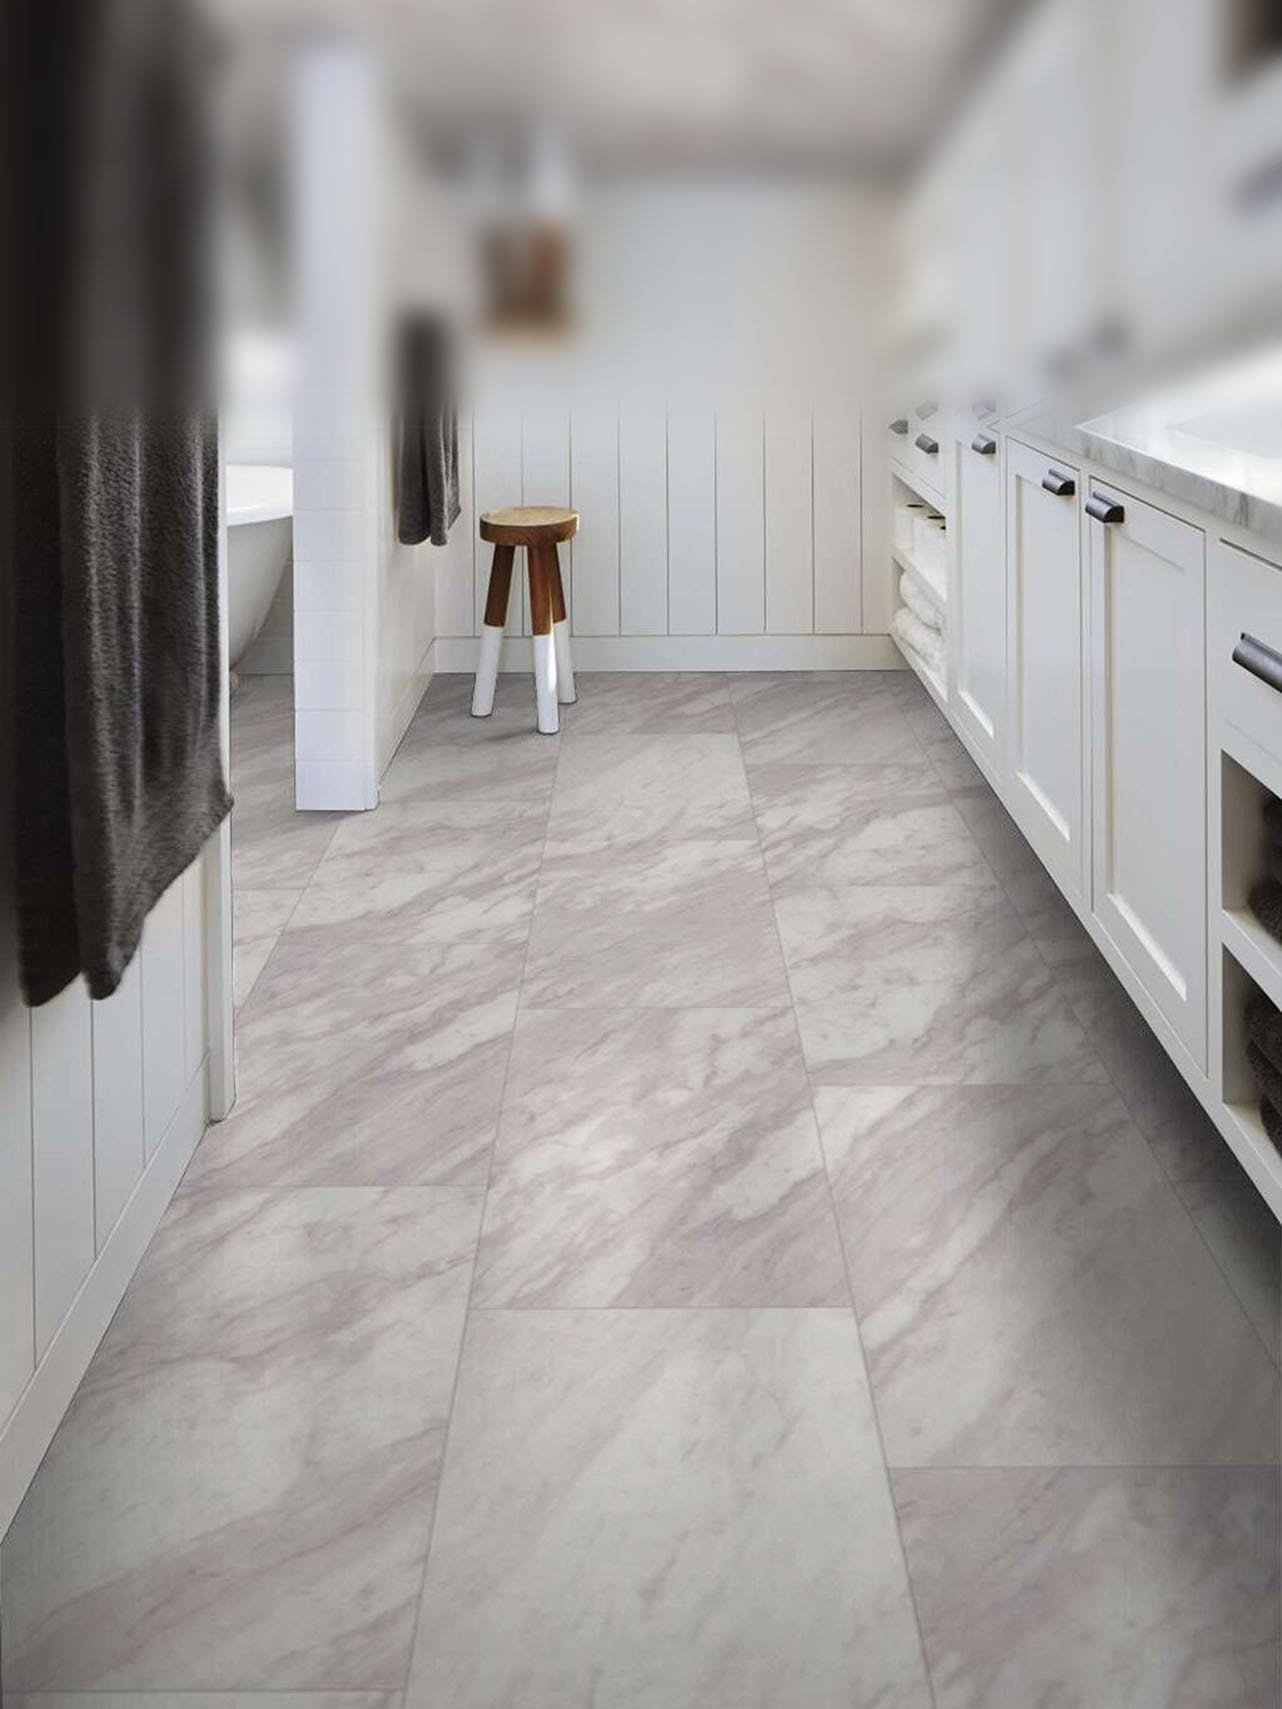
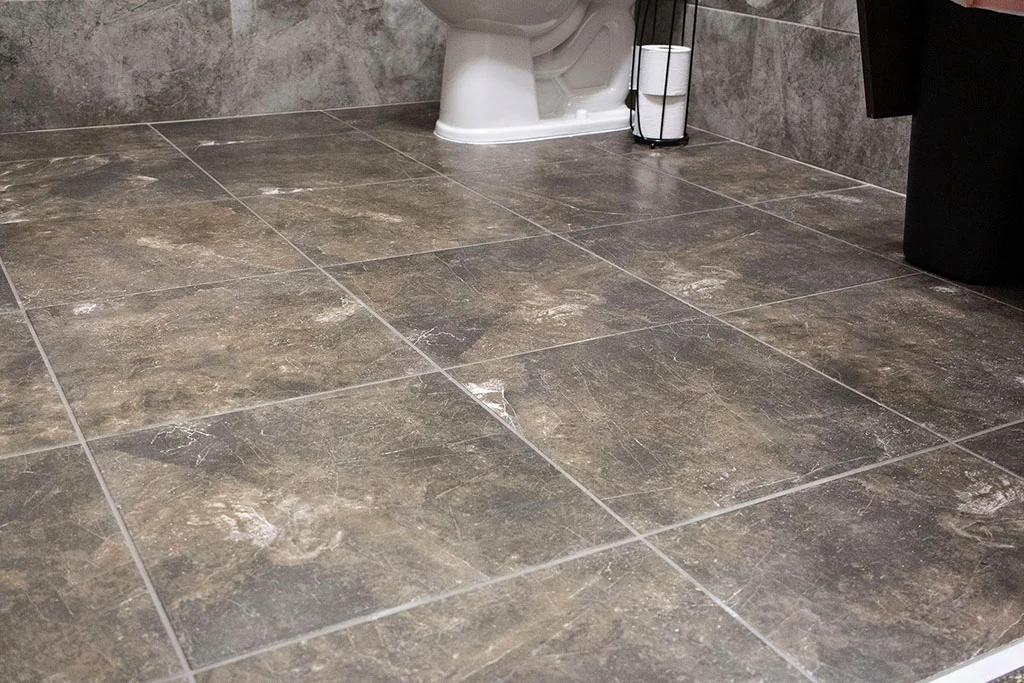
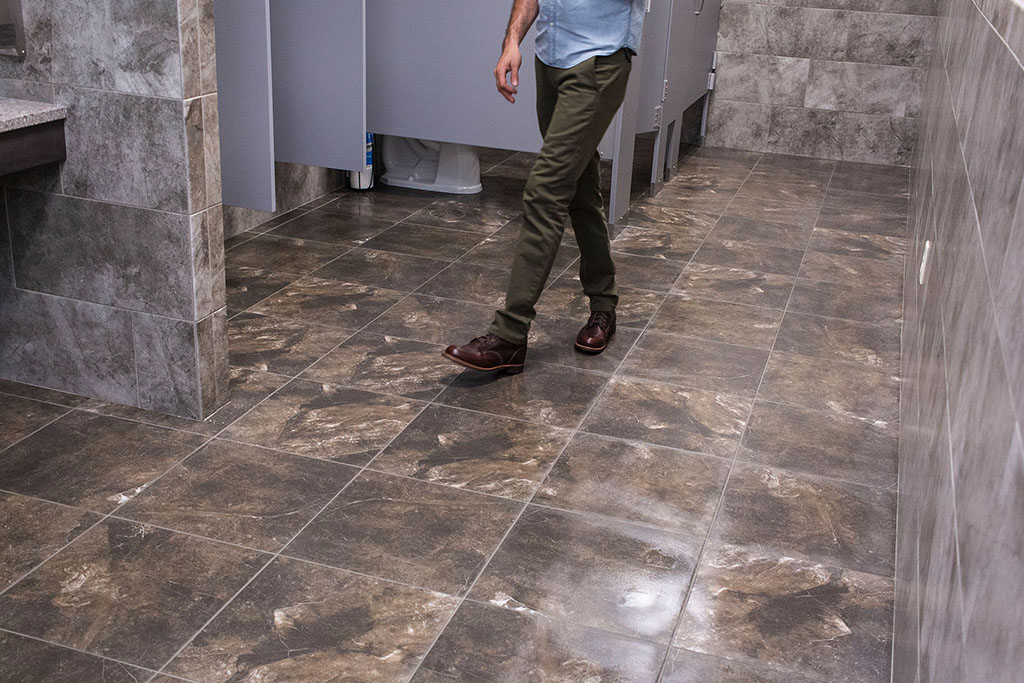
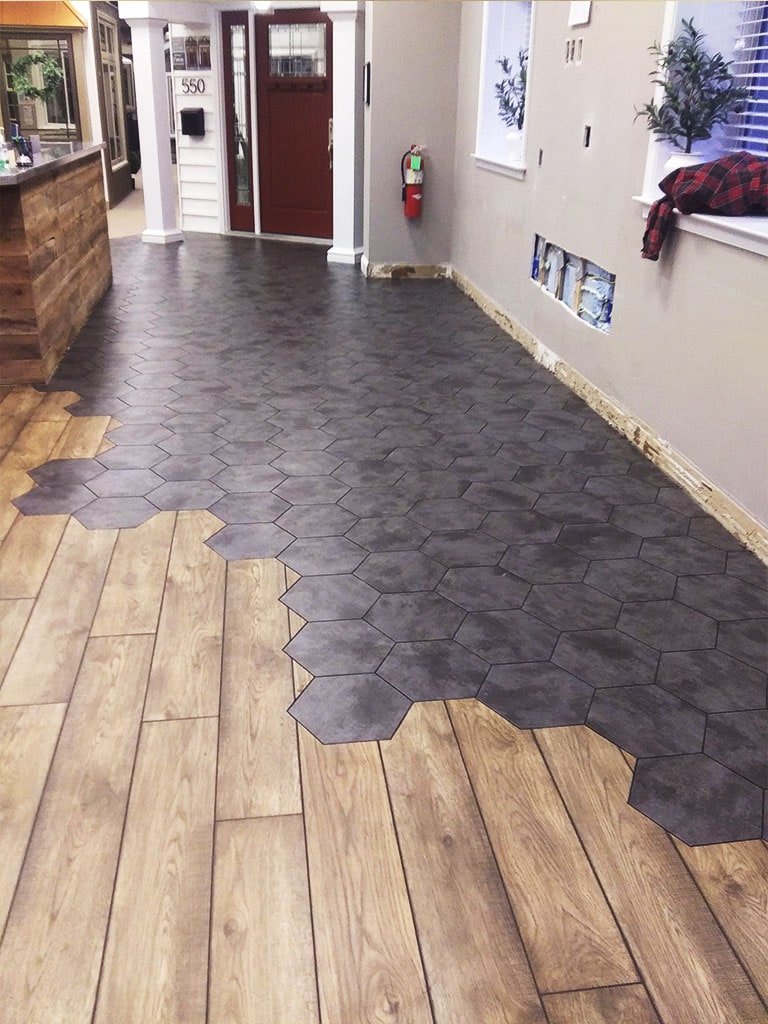
With many advancements in LVT, people can enjoy the look of tile and the benefits of vinyl. As we mentioned, vinyl is easy to maintain and is itself waterproof. Compared to ceramic or porcelain tile, it’s warmer underfoot, making it perfect for bathrooms and kitchens. Examples of SPC resilient vinyl are Armstrong Flooring’s Alterna and Congoleum’s Duraceramic products, pictured below in that order.

FORMATS OF RESILIENT VINYL

Resilient vinyl comes in 3 basic formats: sheets, planks, and tiles.

Sheets

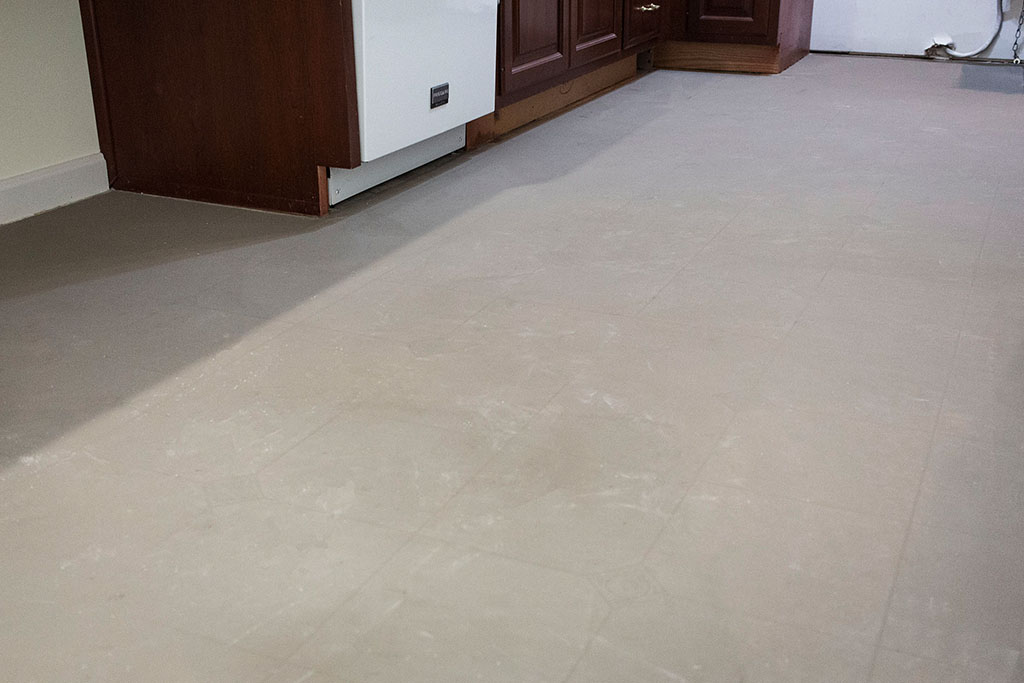
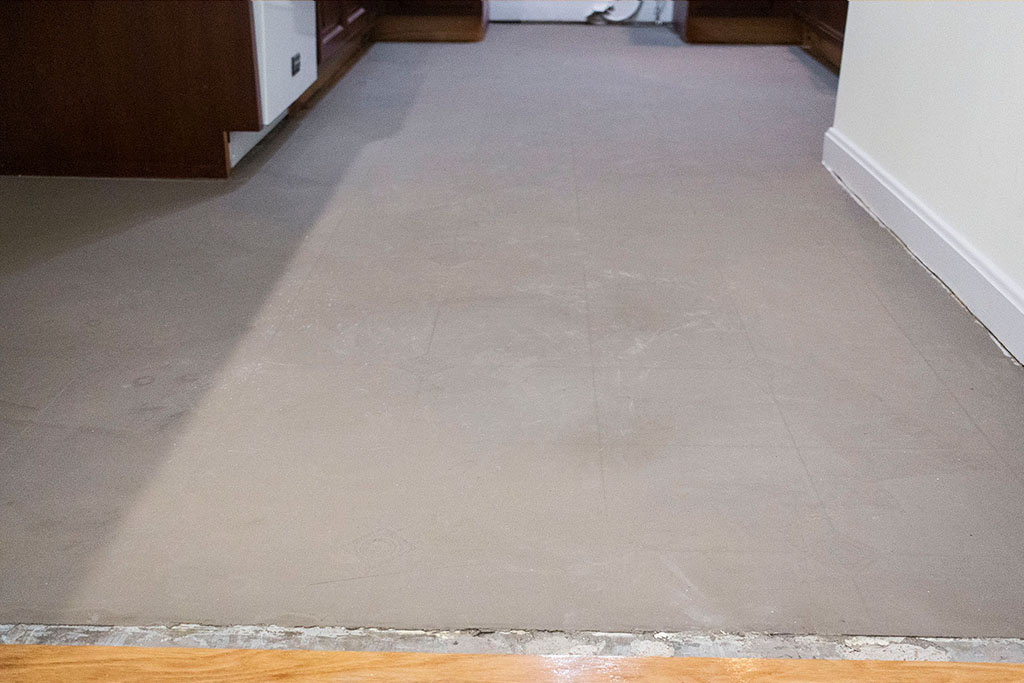
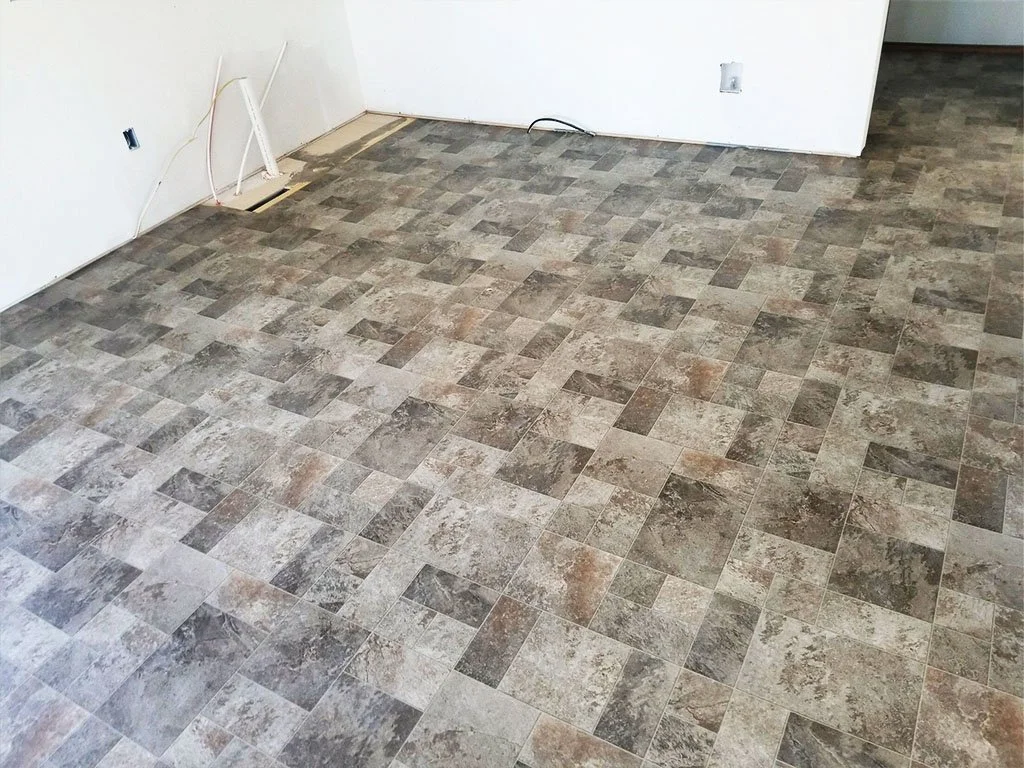
Resilient sheet vinyl, often mistakenly called ‘linoleum’, typically comes in 12 ‘ 6” rolls, though some companies produce 13’ or larger rolls. The sheet vinyl option boasts a low price point with entry-level sheet goods starting at $1.00 per square foot. As we already mentioned, in addition to the price point, a significant benefit of the sheet format is the waterproofing provided by one continuous sheet. Since there are no seems within the 12-foot sheet, the chance of water penetrating through them is eliminated!

Planks (LVP) + Tiles (VCT & LVT)

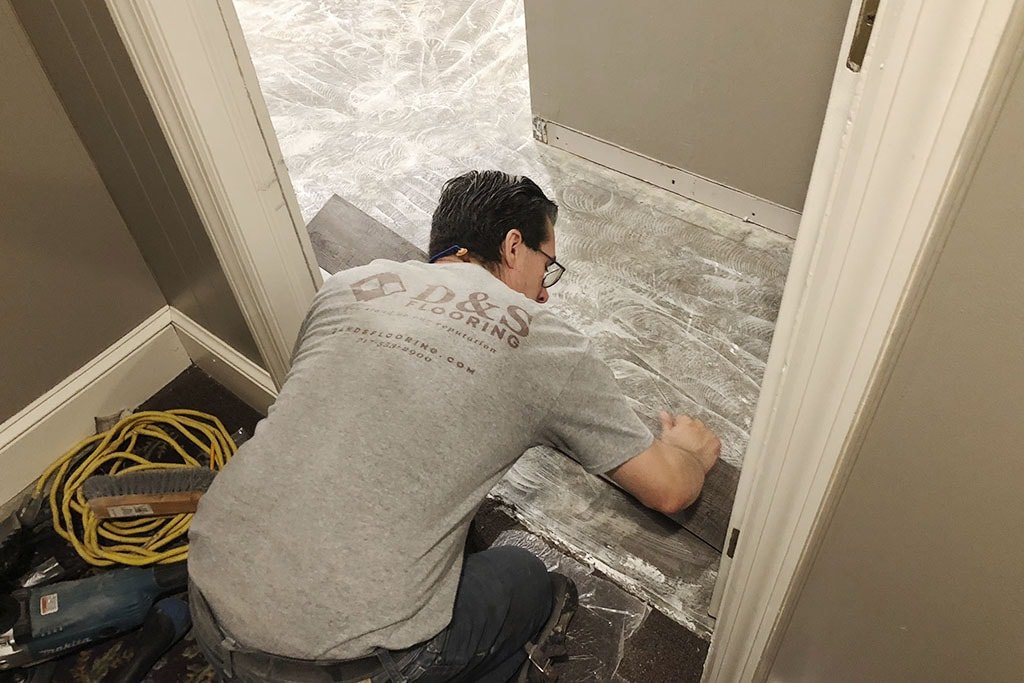
Planks and tiles offer a high degree of realism. With beveled edges, graphics that vary from piece to piece, embossing that compliments the stone or wood look, and the introduction of rigid cores, planks and tiles do a much better job mimicking real hardwood and stone. Planks can vary in size from your 4” x 36” to as wide and long as 9” x 72”! Tiles are available in dimensions of 12” x 12”, 16” x 16”, 12” x 18” or 12” x 24”. SPC resilient vinyl tiles can also be installed with spaces for grout to simulate a tile floor look. An additional benefit is the option to “float” the floor as the tiles or planks with interlocking mechanisms can be installed without flooring adhesive!

Mannington ADURA® Max Sale

web-adura-max-sale-baltic-february-2021-dandsflooring-min.jpg

From now until May 31, 2021, Mannington is running a sale on their ADURA® Max line of resilient vinyl flooring. The beautiful, durable, sound-dampening, scratch and indent resistant, and waterproof LVP and LVT floor coverings are all $.40 per square foot. That could be hundreds of dollars in savings for your next project! ADURA® is easy to install and maintain.

Learn more about it on Mannington's website: https://www.mannington.com/Residential/Adura-Vinyl-Plank/AduraMax ..and message/visit us to get your next vinyl flooring project rolling with the D&S team! 😀

  • ADURA®Max is an expanded polymer core floor (also known as WPC)

  • ADURA®Max dampens sound by 30%, for more peace and quiet in homes with multiple stories, plus those with media rooms, music rooms and kids play spaces

  • Can be installed over existing hard surface floors, including those with grout lines (like ceramic tile)

  • Features a thicker, more rigid waterproof core called HydroLoc™

  • Features ScratchResist®, a premium scratch resistant surface protector, which helps keep floors looking newer, longer.

  • Available in both planks and tiles

  • All Mannington floors are FloorScore® certified which means they are independently tested and meet stringent indoor air quality standards. This certification also qualifies all of our floors for low VOCs

Learn More About ADURA®Max


ADURA® Max Sale Form

Skim Coating | Floor Preparation

IMG_0025-skim-coating-web-feather-finish-floor-preparation-new-holland-pa-february-2019-dandsflooring.jpg

About Skim Coating

Skim coating in floor preparation is a process in which a compound is applied to the subfloor as an underlayment to reduce variations in the floor and provide for a smooth and adherable surface over which new floor coverings can be installed. Sometimes a floor requires a thick layer (up to a 2 inches) of cement patching compound to eliminate issues and make it ready.

In our case in New Holland, PA where we were installing sheet vinyl over a previous layer of sheet vinyl, all we needed was a thin skim coat layer. We used Ardex Feather Finish to smooth the surface as well as to introduce a drying agent for the adhesive. Feather finish is self-drying. It crystalizes the water enabling it to dry without the need for evaporation. If, for example, you install your new sheet vinyl directly over vinyl without embossing (putting a thin layer of mud over the surface and thus providing a gripping surface), the glue is not likely to dry and may not grip to the finish of the vinyl.


Do you need to update your old floor with some new luxury sheet vinyl? Give us a shout!


IMG_0020-skim-coating-web-feather-finish-floor-preparation-new-holland-pa-february-2019-dandsflooring.jpg

Our installers Chad and Joel Martin made this skim coat as smooth as butter for the new sheet vinyl to be installed. The layer of coat is very thin, measuring 1/16” to 1/32”. It’s just thick enough, however, to eliminate telegraphing of the old floor (where the patterns, lines, and bumps in the subfloor’s surface show through to the new layer of flooring). You wouldn’t want this straight-lay pattern showing through to your new flooring with, say, a brick-set pattern. Besides the problem that would be presenting by glue that didn’t adhere, it would be unsightly!

Good work, gentlemen.


Did you know that much went into installing vinyl flooring in a kitchen?

New Holland Transport

IMG_8674-web-tile-floor-bathroom-new-holland-transport-september-2018-dandsflooring.jpg

In the summer of 2018, New Holland Transport (NHT), temperature controlled trucking and cold storage warehouse, completed their new facility in Denver, PA. We had the privilege of providing flooring for their project, installing tile, carpet, and vinyl in several rooms and spaces. Here are some shots with details about the work and specific products!

STAIRWAYS | Steps + Landings

For the stairs, Josh Plank, our lead flooring technician, installed Roppe Heavy Duty round nose treads and risers in steel blue. The treads are constructed of a highly durable rubber with a raised design. These treads are going to last a long time and look great! For more detailed information on this product, check out Roppe’s site. Great choice, NHT!

On the landing of the stairways, Josh installed Parallel 20 Los Angelimed wood-look LVP manufactured by Armstrong Flooring with 1/4” plywood underneath as well. Each glue-down plank, measured 6” x 48”. LVP should serve them well as it’s easy to clean, scratch resistant, and resilient. You can learn more about this product on Armstrong’s site. There was also some carpet on one of the landings that we will talk about in the next section…

UPSTAIRS BANQUET AREA | Kitchen + Carpet

IMG_8647-web-kitchen-backsplash-lvp-vinyl-plank-wood-look-new-holland-transport-september-2018-dandsflooring.jpg

Upstairs, we installed some more Armstrong Parallel 20 LVP and a backsplash. The tile used in the backsplash was a 6” x 6” tile by Vallelunga in style Pietra Romana and color Grigio. For grout, we used Laticrete Spectralock Epoxy grout in light pewter. In terms of stain prevention and durability, epoxy grout is excellent and outperforms all other types of grout. For more information about the grout, visit Laticrete’s site.

The carpet tile installed is a Philadelphia Commercial product in color “Embrace Courage”. The 4.5” carpet base installed is also a Philadelphia Commercial product in their Emphatic II 30 style line in color Weather Vane. Who knew you could use carpet as baseboard?

TILE | Upstairs Bathroom & Downstairs Kitchen

IMG_8670-web-tile-floor-new-holland-transport-september-2018-dandsflooring.jpg

On the floors in the downstairs break room, bathrooms, and at the foot of the stairs is a tile from American Olean (AO) style Bevalo measuring 18” x 18” in color Charcoal grouted with Laticrete Spectralock Epoxy color Natural Grey. The tile base was the same style and color tile from AO measuring 3” x 12”. A durable tile that will serve them well!

On the walls in the bathrooms, we installed a Marazzi tile style San Savino measuring 12” x 24” with the same Natural Grey Spectralock grout. Finishing the top row of tile is a bullnose tile. Tile can be set in a number of different ways. NHT chose a brick set pattern for the wall tile and straight-lay pattern for the floor.

THANK YOU

Thanks for reading and thank you NHT for the privilege of providing you with quality flooring solutions for your new space!

new-holland-transport-september-2018-dandsflooring.jpg

A Conversation with Josh Plank, Lead Flooring Technician

There’s a lot more to installing new floors than securing them in place. From material selection to properly preparing the subfloor to putting the finishing touches on the project, there are many details to take into consideration to make the final product excellent. It’s these fine details that separate the good from the great. In this video, we’re talking to our lead technician, Josh Plank, to hear of the provisions our installers make to ensure a beautiful and enduring work. With this presentation, we are also aiming to prepare customers for what to expect on a new flooring project and if they would happen to run into a need for repair down the road.

Transcript

Nick: Tell us a little bit about your experience in the flooring industry. You’ve been doing it for like 10 years or something like that?

Josh:  Actually, I have 17 years experience. I started working for my stepdad when I was 17 as a carpet helper. I’ve been at D&S for about a year and a half.

Nick: Having a good time?

Josh: Yeah, I like working here. I specialize in hard surface installations, anything other than carpet and ceramic.  I do do some of those from time to time. It’s not really my specialty but..

Nick: You can do it and get it done.

Josh: You have to be well rounded. Yep!

Nick: That’s excellent! From your perspective what should a customer take into consideration when they’re choosing a new flooring product?

Josh: That’s a good question. I mean, typically I would say skies the limit at this point. Most flooring now is designed for families with pets and kids. And there’s carpet with waterproof backing and pad with waterproof membranes on the top. A lot of the vinyl products that are popular right now. Vinyl planks, tiles.. the floating ones are waterproof. They’re putting more aluminum oxide in the finish of hardwood for scratch resistance. So I would say it’s really about what you like and how much you want to spend. I wouldn’t put carpet in a kitchen/bathroom obviously. As far as other things, I mean, I’ve seen lot of hardwoods going into kitchens now. 

Nick: Is it like a newer trend, the hardwood in kitchens?

Josh: The past 5/7/10 years has been, you know, coming around more. People do a lot more open layouts. They’re running the same thing throughout the whole downstairs her house. Whether it be hardwood or vinyl plank. The printing abilities they have now it looks more realistic now (vinyls) than they did 10-15 years ago. I’ve seen pictures of stuff… I’ve taken pictures of jobs where I was impressed with how it looked, and people were like, “Oh is that wood?”  And I say, “No, it’s actually a vinyl product.”

Nick: So you’ve worked with a lot of different materials. If you’re recommending to a customer in terms of what’s going to last the longest, what would be some of the top few things you would mention?

Josh: There’s two products to get out to me for for longevity and durability. They would be in cork (solid cork) and linoleum. They’re the two most green products, if you will, natural products. If they’re installed properly they can last 40 to 50 years or longer. Now the cost on those is fairly high and you really have to like what you’re putting in obviously if you want a floor to last that long. I would say right under that would be ceramic tile and solid wood, would probably be your next step down. And then you’re looking at your engineered’s, your vinyl products, your sheet vinyls, your vinyl planks/tiles that sort of thing. Then carpet would be at the bottom of the list. I’m not saying that carpet’s going to last you two days or anything like that, but it’s not, I would say, as durable. It’s a softer product than some of the more hard surface things. 

Nick: There really are a lot of options out there for customers. Options out there for customers so let’s talk a little bit about demolition and removal what should customers expect and what typically goes into that part of the process

Josh: Removal and demolition is typically your job most labor-intensive part of the job depending on, obviously, what you’re removing. Ceramic tiles for example, if you are tearing out a bunch of that, I mean, that can take a week depending on the size of the job. Usually, we plastic stuff off as best we can. Carpet… I mean, you can go from that end of the spectrum down to carpet which is usually cutting stuff up and taking out the tack strip and the pad staples. Typically, that’s not quite as long of a process. We do try to keep, you know, dust down/noise down as much as we can. However, we are a construction company. I know a lot of people don’t typically put flooring in that category because it’s more of a decorating type of a thing, but we still are a construction company. 

Nick: So sometimes customers will do the demolition, but we also offer that?

Josh: sometimes people want to tear it out themselves, save some money. That’s fine. But typically I say about 80 to 90% of the projects, we do the tear out/demolition. 

Nick: So taking care of the environment, I know, is important to us. What are some of the things we do to ensure that?

Josh: For example, if we are tearing out hardwood, typically we burn that; as opposed to putting that in a landfill. Cardboard we recycle. The only problem is, construction waist is hard to dispose of to wear it doesn’t go into a landfill. We strive for the best we can do in that area.

Nick: so tell us a little bit about what goes into floor preparation.

Josh: floor preparation would be, especially on the hard surface end, Going to be the foundation that you build upon. A good analogy is a foundation like a house. You could have the nicest looking house in the world put your foundation could not be up to par…

Nick: and that would make all the difference..

Josh: Exactly. So as far as floor prepped, mostly for what I do… Typically you’re looking to get a floor smooth. OK? And as flat as possible. We don’t want to say level because unless you’re pouring self leveler, you’re not going to get a level floor. That can be done at a cost… Basically from my end of it, I am looking at.. concrete: is there a hump that can be ground out? Is there a low spot that can be filled in by pouring on cement patching compound? Holes: they need to be filled as well. Wood substrates: You’re looking at your subfloor joints. They need sanded. Another key thing for what I do typically is under cutting. That could be door jams, brick hearths, stone hearths, brick walls, even ceramic tile walls in bathrooms can be undercut. It gives you a more finished look to a job, almost like it was meant to be there, as opposed to (scribing). We are able to scribe material, but to me, the more you can undercut the better of the job you’re going to get as far as aesthetics go.

Nick: Wow! So a lot goes into floor preparation.

Josh: yeah, I would say typically, 60% of the work that’s done for me would be floor prep.

Nick: if you don’t do floor preparation right, it’s not necessarily going to be hidden by the product that goes on top.

Josh: Correct. Yeah. Typically, floating floors are usually the real key to that one because they are floating, and if you have a lot of variance in your floor, you can feel movement up-and-down. Say for example you’re working in a house that was built in 1870, say. The subfloor in there can be fairly wavy. It’s not going to be like you’re working in a house that was built 10 years ago that you’re trying to redo where everything is a lot more flat. We do the best we can with what we have to work with and communicate that with the customer to handle their expectations as well.

Nick: We make it a point at D&S to be excellent at what we do. What would you say distinguishes us as ‘expert installers”?

Josh: There’s plenty of things in that. Attention to detail is definitely A big one. Professionalism on the job… We are a service business. It’s not just about putting a floor in. I mean, it’s about communicating with the customer, handling their expectations, holding ourselves to a high standard as far as installation goes, installing a floor properly per manufacturers recommendation, (and) making every job look the way a customer in vision is it looking. Technically, you could be the best flooring installer in the world and not be able to communicate with someone and it’s basically pointless. That to me is what really separates the good ones from the great ones. The attention to detail thing is definitely key. Flooring installers have to wear a lot of different hats. We do trim-work. We do concrete finishing if you want to call it that. I mean, we do a lot of different things.

Nick: You’ve been installing for 17 years, what are some of the top mistakes you’ve seen made or maybe some DIYers would make?

Josh: floor prep is a big one. I mean, again… To me it always goes back to that. Undercutting jams… Not Knowing how to properly finish the floor as far as, like, on a hardwood installation puddy-ing nail holes correctly, Installing trim-work correctly, installing… Moldings or a big one. Transitions. Transitions our very difficult to install sometimes..

Nick: Transitions.. so one type of flooring goes into the next?

Josh: Correct.

Nick: Or maybe different levels?

Josh: Yep. Different levels of floor, different heights. What do you do here or there? Making transitions work that aren’t necessarily designed for the use that you need them to do.  Not nailing underlayment correctly Is another one I see. If you don’t have enough nails in your underlayment, overtime they could bubble up, almost like a trampoline type of fact. When you push down… Your flooring is glued or adhered to the underlayment but the underlayment is not adhere to the sub floor… Not caulking properly is another one. I mean, the sky is the limit. I’ve seen all kinds of stuff.

Nick: (Laughing) yeah.. One time there was like a hole, right? And someone took a soda can?

Josh: Oh yeah yeah.. i’ve seen soda cans nailed on top of holes in the floor. I mean, just anything you can imagine.

Nick: So something that would distinguish as Expert installers is, yeah the final product, but all that goes… All that hidden stuff that goes into floor preparation.

Josh: I would say… There is a flooring company where part of their name is flooring systems. So basically, they are saying that from their glue to the prep to the material is one system. And that’s what we’re trying to do. Everything in the system plays a part from top to bottom.

Nick: So in terms of percentage, how much time is spent on installation?

Josh: So percentage of time on installation I would say depends obviously on the type of flooring you’re doing. Sheet vinyl’s: it could be as little as 20% of actually installing sheet vinyl on a job, and the rest could be floor prep and installing trim-work. Hardwood: a little bit more, probably 40%. Same thing with carpet, but again, a lot of your time and hard surface goes into floor prep and a lot of the finishing stuff. 

Nick: You’re going into a customers home, and they are excited. They are getting their new floor, you know, put in that day or, you know, The next two days. Maybe what’s something customers should expect for like the day of installation or like maybe even before hand?

Josh: If we are moving furniture, we can do that. We typically ask if a customer can move some of the small items out, out of their furniture. Say if you have a China cabinet where you have a bunch of breakable things in there, we ask that you remove those. If, you know, in a residential house if we need access to water or power… If we can use those things, that we have access to them as well…  if we are grouting a floor or gluing a floor, pets should be put away where they’re not going to, you know, run through something you can track throughout the house.

Nick: When you’re installing, is that room typically off-limits?

Josh: Depending on what you’re doing, it can be. With grouting especially, you don’t want any traffic on that for 24 hours. Heavy rolling loads on vinyl floors, anything glued down. I mean, we can put fridges and stoves back. Once it’s installed, we roll them or carry them in on something to protect the floor. Foot traffic is normally is ok. Typically I say if I’m walking on the floor, you can. Showers and things of that nature, I’m not 100% sure on the timeline for that. I believe its 3 days after, 3 to 4 I think.

Nick: In terms of getting it wet?

Josh: Right. Exactly. If I’m installing vinyl in your bathroom and I caulk at your tub, you know, silicone caulk your tub. You can use your shower but just be mindful that caulk usually takes 24 hours to cure. 

Nick: So we’ll talk about repairs at this point. What are some of the most common repairs that you find yourself doing?

Josh: I would say, carpet: “Oh my dog tore a hole in something..” or “my cat”. You spill something on your carpet or burn it (with a) hot pan/candle. Hardwood would probably be like a scratched board or something you drop something on and put a ding in it. Same thing with vinyl plank. Sheet vinyl I see a lot of, “Oh! I moved my fridge out to clean it. And I… there’s a divot when I rolled it back.” 

Nick: As you’re going out to make these repairs, what are some of the easier flooring types to fix

Josh: Carpet is probably the easiest. That and sheet vinyl. Typically you can, you know, cut a square out or cut a tile in your vinyl pattern out and put another one in. Hardwood and like glue-down vinyl planks fairly easy. Engineered wood would be easier. Typically you’re cutting a board out and glueing another one in place. Solid wood is a little trickier than that. It’s a little harder to get that in. The two hardest would probably be a floating floor and ceramic tile. Floating floors are notoriously hard to fix because, you know, it’s a floating floor and you’re not adhering it to anything except the locking system. So typically, it can be… tricky. It’s very time-consuming because they don’t always want to go back together properly. You’re having to glue and this and that but not glue to the floor. 

Nick: So it’s possible but just maybe something customers can be aware of when they’re purchasing a floating floor. Hey, if this plank gets ruined it’s fixable but it’s going to take a little bit of time.

Josh: Right. Yeah. And I’m not saying it’s going to take days. It would just take an extra hour or two.

Nick: Any other general comments you would have?

Josh: I know all of our guys are passionate about what they do and are striving to do the best job that, you know, that we can for you. To me, if you’re not passionate about something, you’re not going to be good at it. I know for myself, I’m really passionate about flooring and I have been and I will be. I mean, I can’t see myself working in any other industry. When you’re shopping for a company to use is to keep that in mind because you do ultimately get what you pay for and that all goes into it. 

Nick: Thanks for sharing that Josh!

Josh: Yep, (I) appreciate it. 

7 Indoor Flooring Maintenance Tips | Care for Your Floor

Clean, Maintain, and Protect your Hardwood, Tile, Resilient Vinyl, and Carpet Flooring

josh-tangert-960-shaw-hard-surface-cleaner-D&S-flooring-min.gif

HARDWOOD

Whether engineered or solid, these insights will help you keep your hardwood floor in good shape.

  1. Sweep, dust and vacuum your floors. If using a vacuum, attach the proper hard floor adapter to avoid scratching the finish of your wood.

  2. Use the right cloth. Microfiber is best. It kind of goes without saying, but especially avoid steel wool, scouring powders, or abrasive cleaners. Also avoid using a buffing machine. You know, the ones designed to remove floor finishes...

  3. Use the right cleaner. Choosing the proper cleaning solution depends on the finish of your hardwood (surface finish or penetrating finish), not so much the wood itself. Using oil-based, wax, polish or strong ammoniated products can dull your floor’s finish, and that would not be cool. We carry Shaw Floor's hard surface cleaner in our showroom. (You may have noticed Josh demonstrating it.)

  4. Wipe up spilled water immediately. Dry any standing water as soon as possible. Even surface finished hardwood can suffer water damage.

  5. Don’t mop (in the traditional sense where you're soaking your floors with lots of water). Mopping your hardwood floor introduces way more water than you’d ever want to spill onto your floor by accident. This excess water could seep into the wood fibers and cause swelling and warping, and that would be sad 😢

  6. Use entry mats and floor protectors. Implementing the use of entry mats in high traffic areas and floor protectors underneath heavy furniture can increase the lifespan of your floor. Ask us for some felt floor protectors, and we'll hook you up.

  7. Rearrange Your Furniture Periodically. Let your flooring share the load as evenly as possible by redirecting high traffic each time you move your furniture around.

    1. BONUS. So here’s another cool tip: If you drop gum or candle wax onto your floor, you can remove it by first hardening it by rubbing it with an ice cube and then scraping it off with a plastic card.

TILE

Keeping your ceramic, porcelain, or natural stone tile at its best.

  1. Sweep or vacuum first. Before using any cleaning solutions on your tile, remove dirt and debris with a soft-bristled broom or vacuum with a hard surface attachment to avoid putting scratches in your glazed tile.

  2. Glazed tile cleaning. Mmmm… glazed. After sweeping or vacuuming, clean your tile with an all-purpose (non-oil-based) household cleaner. Mixing some water with a mild detergent also works. If you’re feeling creative, you could introduce an acidic ingredient like fresh lemon juice to your cleaning solution, effective for removing soap scum and alkaline type stains. Don't add an acidic solution to your cleaner if you're cleaning marble or other natural stone flooring. The pH balance in your cleaning solution needs to be neutral or it will break down your material. Read more about caring for your natural stone flooring in this article.

  3. Unglazed tile cleaning. Unglazed ceramic or porcelain (man-made) tile lacks the melted glass coating of its glazed counterpart. It’s a lot less slippery when wet but more porous which means you need to be more gentle when cleaning it. Hot water and white vinegar mixture is recommended. The vinegar mixture is great especially if you have kids and pets since it’s chemical-free and safe if ingested.

  4. Cotton, microfiber, or chamois-style cloths. Avoid using sponges or sponge mops as they tend to push dirt and grime into cracks and grout joints.

  5. Grout Joint Cleaning Tip. Mix baking soda and water together, forming a paste, and rub it onto your dirty grout joints. After letting it sit overnight, scrub the grout with a stiff nylon brush. Repeating this step to get your desired results may be necessary.

  6. Reseal your floors. If you want your tile installation to keep looking good and remain mostly impervious to stains, seal them after installation then reseal them every year to 2 years. If water doesn’t bead on the grout lines, it’s probably time for the resealing regimen.

  7. Protection. Tile is strong, but it still suffers wear and tear. the use of mats in high traffic areas and floor protectors underneath furniture is recommended.

RESILIENT VINYL

Follow these tips to keep your resilient vinyl flooring (Sheet/LVP/LVT) in tip top shape.

  1. Immediately following installation. Keep foot traffic to a minimum. And for glue down vinyl, avoid putting furniture on the floor until after the first 24 hours.

  2. Clean Daily. (Or at least make that your aim) Clear your floor of potentially damaging dirt and grit by dust mopping or sweeping every day. Having good entry mats can cut down on the amount of dirt and oil tracked inside from the great outdoors.

  3. Clean spills immediately. Vinyl is waterproof but leaving a spill standing on your floor for a long period of time increases the chance of staining.

  4. Protection. Hopefully you get this by now. Protective mats (without rubber or latex backing) at high traffic areas and pivot joints (like in front of your kitchen sink) can increase the longevity of your floors and prevent visible wear spots. Floor protectors (plastic or felt) that are non-pigmented and at least an inch wide are recommended.

  5. Avoid direct sunlight. This is a tip for all flooring and furniture, really. Lower the blinds during bright times of the day to minimize direct sunlight on your floors. Over time, it can cause discoloration. Excessive temperatures can also cause expansion of the vinyl material. While some companies are coming out with dimensionally stable options, it's still a good tip!

  6. Do not use vinegar or soap or detergents. Soaps and detergents can leave a dulling effect on your floor's finish. Use an approved resilient vinyl cleaning solution like Shaw Flooring’s R2X Hard Surface cleaner or Mannington Flooring’s Rinse-Free Cleaner.

  7. Do not use a vacuum with a rotating beater bar. It could scratch your beautiful floor, and again, that would be so sad.

CARPET

Whether cut pile, loop, or the cut and loop carpet combo, follow these maintenance and cleaning care tips for your maximum carpet satisfaction.

  1. Install the Right Pad. During installation, get it right from the beginning with the proper carpet padding, especially on stairs. Check the carpet's warranty recommendations and explore your carpet pad options.

  2. Don't Track Dirt Inside. This is so obvious it's almost funny. But seriously, make your life easier and make your carpet's life longer by having good walk-off mats to keep the dirt, grit, soil, and asphalt outside and off your carpet.

  3. Vacuum Regularly. This is stated by one of our main supplier's as the most important maintenance tip. In light of this and the myriad of vacuum cleaner options on the market, we've included a link below to help you make an educated vacuum cleaner decision! We recommend that you then use that educatedly purchased vacuum cleaner to clean your carpets thoroughly, especially in high traffic areas.

  4. Treat the Affected Area Immediately. The sooner you can get at it, the better. The longer spilled foods or liquid stands on your carpet, the more likely they are to leave a stain.

  5. Clean Your Carpets Regularly. Using a hot water extraction method, clean your carpets every 12 to 18 months. It's recommended to hire a professional cleaning service and one that follows the Carpet and Rug Institute Seal of Approval. A poorly cleaned rug can actually increase the rate at which your carpet breaks down. So make sure you don't cut corners here.

  6. Minor Repairs. Use scissors to cut back snags or loose piles. If the there are small burn spots on the carpet, you can use a pair of curved nail scissors to cut back the burnt tips.

  7. Spot Cleaning. When spot cleaning, completely remove the detergent or solution used to avoid any residual sticky residue that just attracts more dirt. Derry, our owner, would highly recommend using Shaw Flooring's R2X Stain & Soil Remover, which doesn't need to be rinsed out. Bonus!

Here are some links to super helpful resources by two of our main carpet suppliers:

Shaw Flooring's Website of All Things Cleaning and Maintenance

Vacuum Recommendations: Mohawk's

UPRIGHT MODEL

Mary, Winner of the $1,000 Grand Prize // Open House 2018

IMG_7707-open-house-derry-lester-grand-prize-1000-d&s-flooring.jpeg

GRAND PRIZE DRAWING

For 2 years now, we've had the privilege of giving away $1,000 in flooring materials to a lucky winner at our open house event. This year, a local resident named Mary won the prize, and their family excitedly upgraded their kitchen and mudroom flooring!

PROPOSAL PROCESS

Josh Tangert, contract sales associate, walked Mary through the process of choosing the flooring material. He was also out at their home to take measurements in order to finalize the proposal. 

IMG_7714-mary-grand-prize-winner-open-house-2018-josh-tangert-sales-1000-D&S-flooring.jpg

Mary and her son in the D&S showroom in Ephrata with Josh, selecting her flooring.

INSTALLATION

Josh Plank, lead technician, managed the preparation, installation, and finishing of Mary's family's flooring from beginning to end. From moving furniture and appliances to special cuts, shoe molding, Josh created a beautiful finished product. 

Here are some photos of the finished product. Mary chose an Armstrong brand vinyl click-together floating floor.

A note about floating, click-together floors: One of the benefits of floating floors is less preparation time and in most cases, less material. With vinyl sheet flooring, a 1/4" underlayment is often needed before the new flooring can be installed. Many of the click-together vinyl products come with a backing already attached.

Flooring Material
Armstrong Vivero Best Luxury Vinyl Plank (LVP)
Style/Color: Homespun Harmony Galvanized Gray
Plank Size: 9" x 48"

Warranty: Lifetime Limited Residential


Mary's kids enjoying their new floor.

Hey Josh! We are LOVING our new floors. We really enjoyed working with you from beginning to the end of the process. We love the importance of family that everyone we met seemed to share with us. Everyone we worked with seems to love and value their family so much, and we do too! (We waited long and worked hard to have a forever family and we adore them!) We would definitely recommend D&S Flooring for any and all flooring needs. You guys are welcoming, warm, knowledgeable, and easy to work with! I’m attaching a couple of photos of the kids enjoying the new floor. The girls were so excited to get home and see the progress each day and were thrilled to bits yesterday with the finished product!! Thank you so much. We thoroughly enjoyed our experience with you all!!
— Mary Olenhouse, June 7, 2018

OPEN HOUSE 2019

We look forward to doing this again next year! When we are 'blessed' by God, we believe it's to be a blessing to our community and feel privileged to serve people this way.

Thanks for reading!